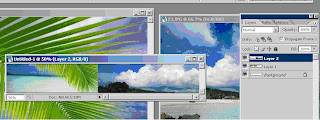
Easy handling of Layer mask
how to make web banner
Use of erase tool, zoom tool
Take your canvas size as 1024pixels X150 pixels
Open several Images and Take one image to the canvas
You can zoom canvas by using zoom tool(z)
Set the Image’s size suit to the size of the canvas
Set your second image too like in the previous step
Set the position of the second layer overlapping some part of the layer 1
You will get a canvas like this

Select the layer which overlap the first one
Add a mask to the layer by using the “add layer mask “ button at the end of the pallet
make sure layer mask thumbnail is selected
select erase tool
check whether your foreground color is white and take larger brush size for your brush
erase overlapping part of the layer
you will see that layer mask thumbnail has got a dark area . that is the place where you erased.
Think that you have erase more than you expected
Then only thing you have to do is just change the foreground and background(White & black) and erase
Then you will see what you erase is appearing
You can repeat above steps for the other images you have selected for the web banner
I will explain how to animate this web banner in the Photoshop or in ImageReady

No comments:
Post a Comment